The Idea
My friend and model, Christiana, reached out to me in 2025 wanting to do a photo shoot that looked like she was in the rain. She had even done research and found a studio here in Valencia that had a special setup for water/rain shooting indoors. I actually had been wanting to do a shoot like this for some time, so I was excited to find out more.
I contacted the studio to find out what the rates would be and also to make time to come see the space before the shoot. This turned out to be a bit disappointing for two reasons. First, the price was pretty high per hour for use of the space as well as the minimum amount of time one could rent the space for.
The second reason I decided to pass on using this studio is that they would not allow one to come visit the space without reserving it as if it was going to be used for a shoot. So not only did they want a lot of money, but you don’t even get to see what the space in person before you pay the high fees for use. That was an easy “No thanks!” from me. However, I had an idea on how we could do this ourselves, with some inexpensive equipment and an outdoor space.

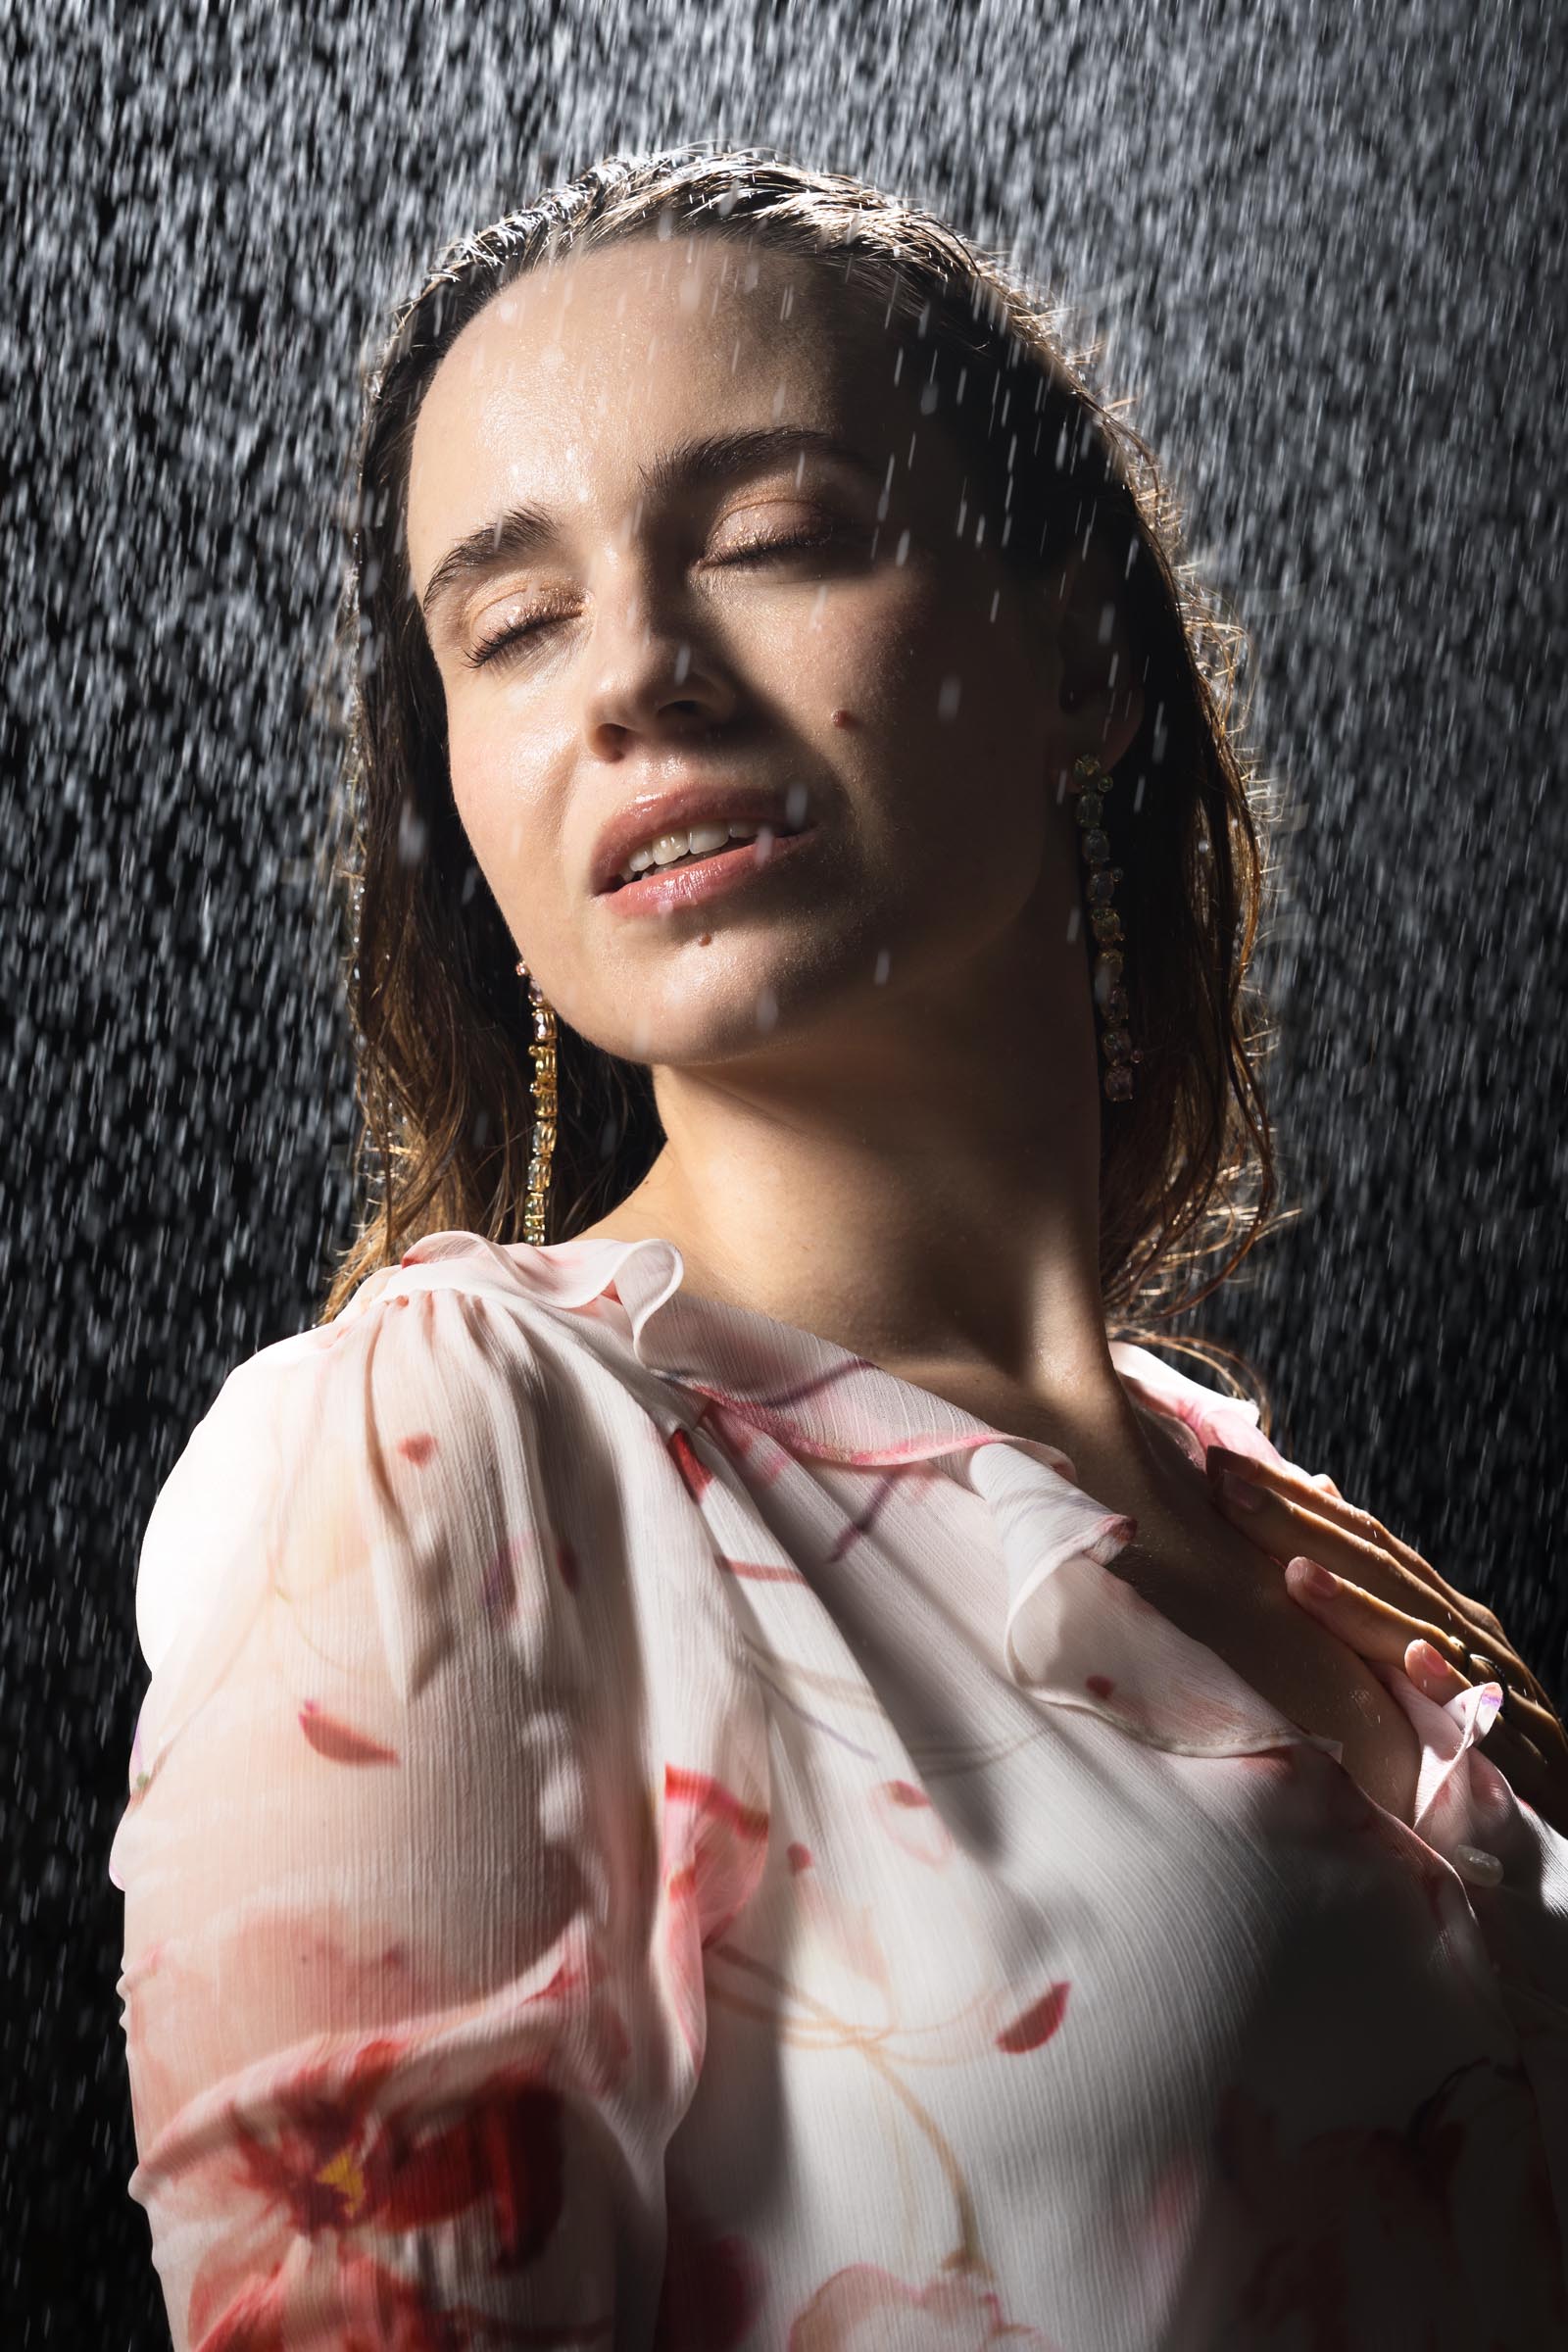
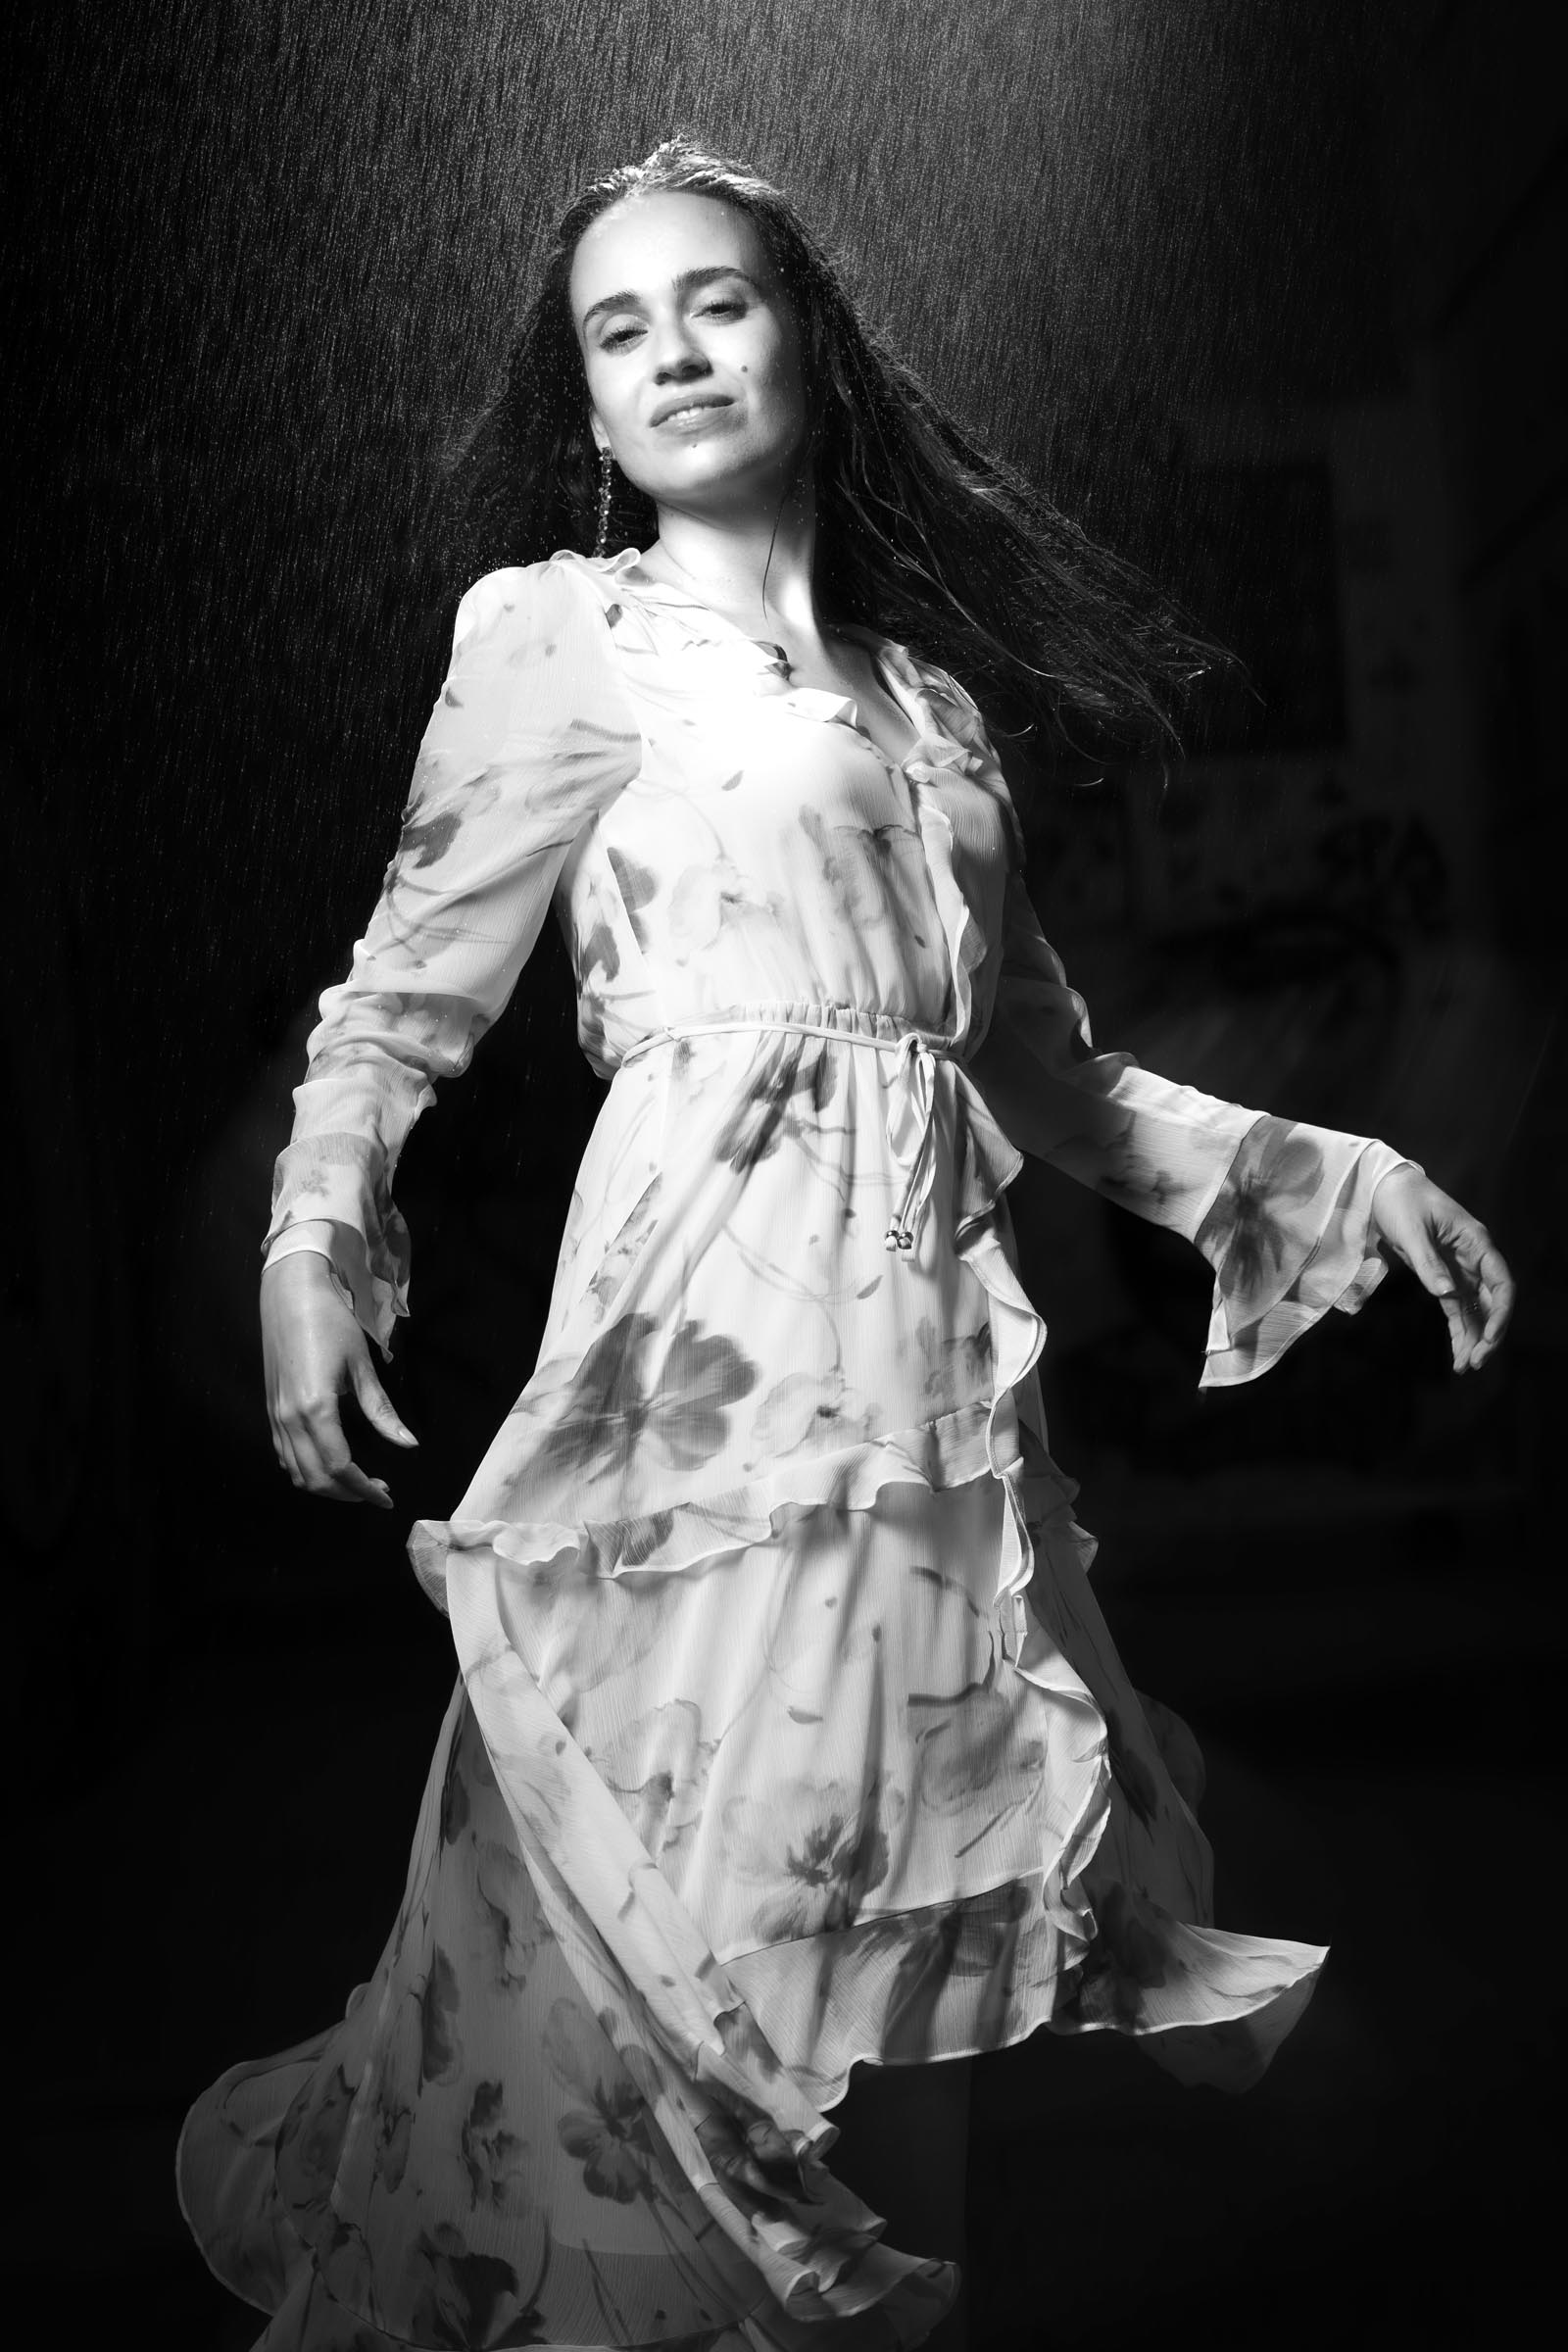
Christiana in the “Rain”
Location
Before getting into the details of how to create the rain, I needed to find a cheap location, or even better, a free one, where we could do this shoot. Near one of my favorite cafes here in the city center is a dead-end alley. We could shoot in this space without worrying about blocking any foot traffic, as there are no residents in this particular spot.

Our location. Photo courtesy of Theo
The Rain Maker
With a location chosen, the next piece of the puzzle was how to create the rain. I needed something that could spray water without needing electricity as well as having enough supply of water to get through the shoot without refilling. Luckily, I had the perfect device at home already: a garden sprayer. This particular sprayer could hold five liters of water and uses a hand pump to pressurize the bottle.
I had used this sprayer in the past to wet down streets for photo shoots where we wanted reflections on the pavement. I knew that we could get several minutes worth of spray using this device. The spray wand also allows you to adjust the spray from a fine mist to a direct stream. This way we could adjust the “rain” to provide the exact effect we were looking for. Below you can see Carmen standing on a stool at camera right spraying the rain for us.
Turning Day to Night
Now that we could create the weather we wanted, we just needed to turn day into night. Our vision was to have this shoot take place outdoors at night, but we didn’t want to actually shoot in the dark. Instead we used outdoor strobes to take the evening sunlight out of the picture.
A pair of Godox AD300 pro strobes provided enough punch to create this look. We used one set at camera left and above Christiana. A grid was used to keep the light focused just on her. To make the rain really stand out, we used a second light high and behind her with a Fresnel lens attachment. This gave us a city streetlight “look”.
Technical Challenges
Once all the pieces were in place, we began our shoot. Christiana did a wonderful job with her posing, and the lighting was working better than we had hoped. Using flash did an impressive job creating the nighttime effect, but it also had a less than optimal effect on the final images. Our “rain” ended up looking like a coarse mist instead of falling rain.
There were two factors at play here. One, the water was falling relatively slowly since it was only getting to fall a few feet from above our subject. The falling water drops didn’t carry the speed that normal rain would when it plummets from the height of the source clouds. The other issue came from the fact that flash units provide a very short burst of light, which will freeze most moving objects. This ended up causing our falling rain to be rendered as still droplets.
NOTE: Due to the flashes freezing the droplets fall, some work in Photoshop was required to get our rain to appear to be falling. This could have been avoided by waiting until it was actually dark and using continuous lights such as halogen or high-quality LED lights. Lower quality LED lights can create a “flicker” effect that would render a series of dotted streaks due to their slower flicker rate.
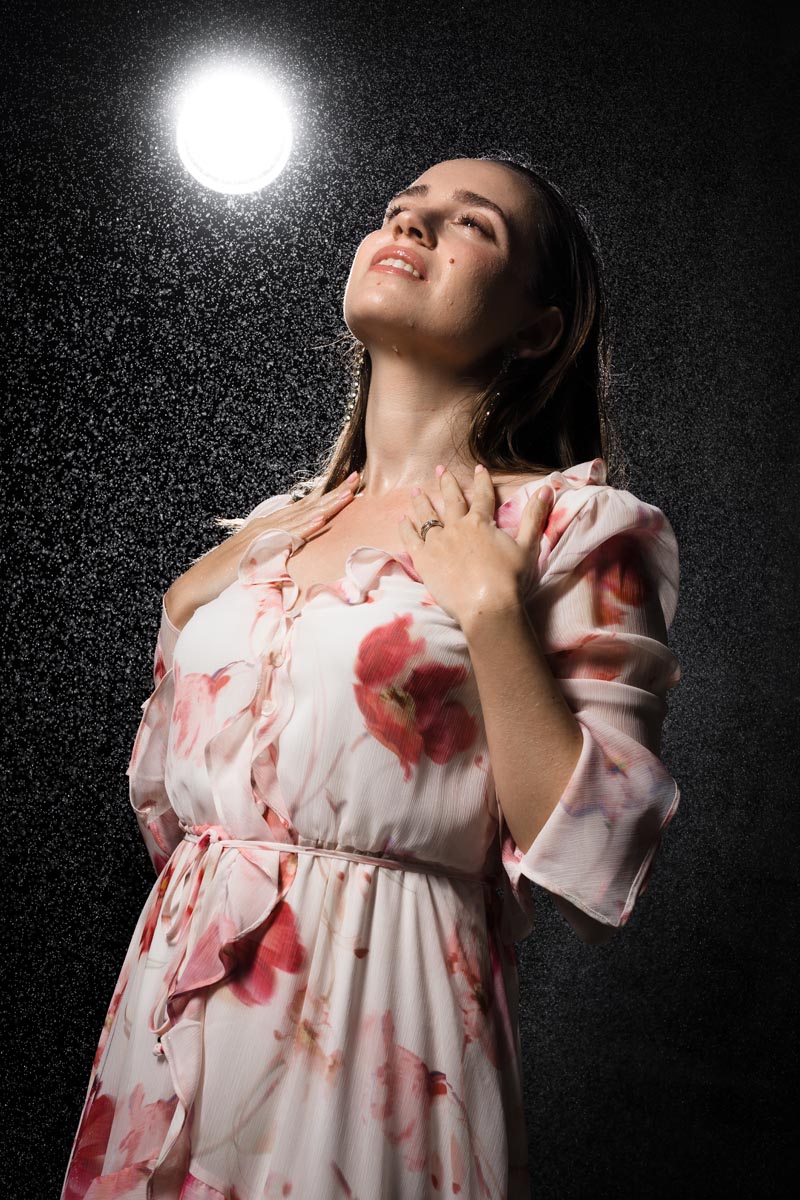
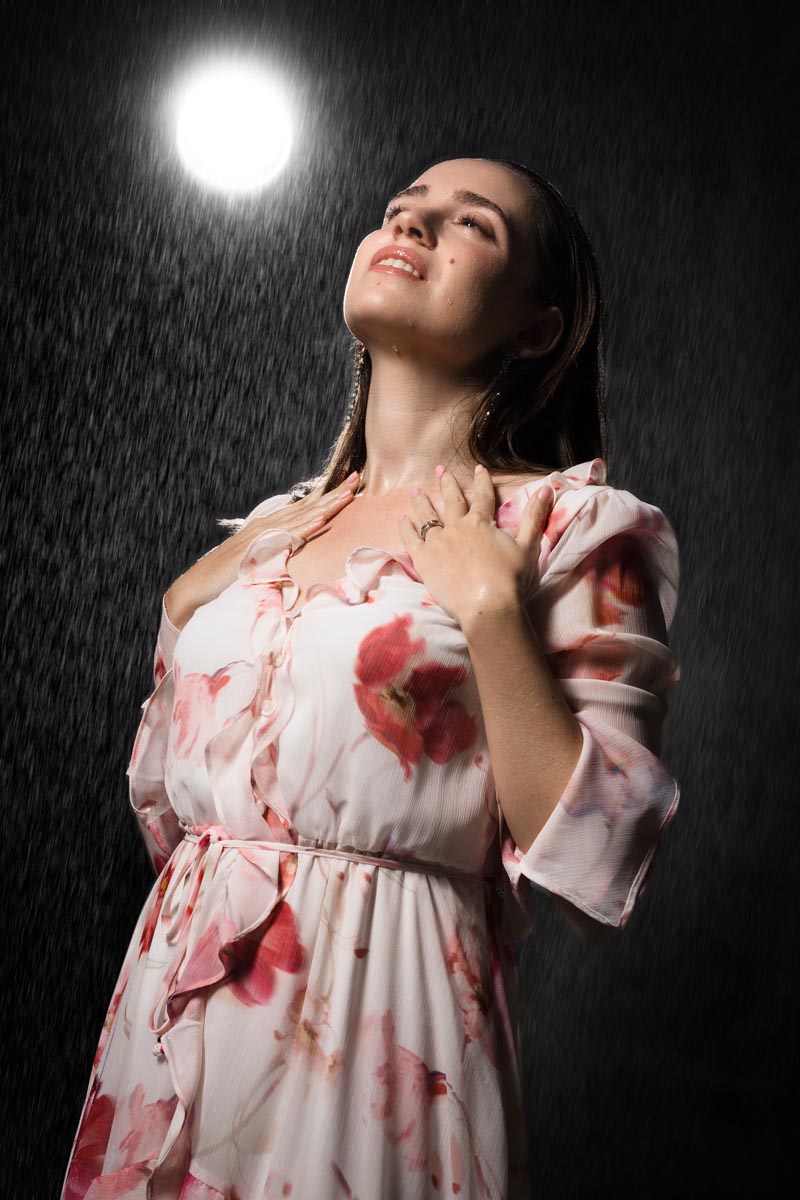
Using Motion Blur
Below you can see an example of before and after taking the image into Photoshop. The first image shows the results straight out of camera with the “rain” frozen in time looking more like a night sky than falling rain. The second image shows the results of my post-processing. Here, I duplicated the background layer and then applied motion blur at a slight angle to give the droplets the look of falling rain streaking down from the sky. Once I had the the blur how I wanted it, I used careful masking to bring back Christiana’s details that were lost from the blur effect.
Final Results
Once I had the setting where I liked them, I applied this sequence of edits to our final picks from the shots taken. In the future I intend to try this type of shoot again and see if I can use continuous light to get the right effect without having to spend time in post to achieve this look. I’m still pleased with the results, especially since this was a first attempt.
I want to express my gratitude to everyone involved in creating these images. Christiana was super patient and professional and a real trooper dealing with the wet clothes and getting repeatedly sprayed in the face with water. Carmen did an outstanding job with making the rain and assisting throughout the shoot. I’d also like to thank my friend and fellow photographer Alex Baker who had also wanted to do a “Rain Shoot” and was excited to be a part of this session. She and her son, Theo, took the behind-the scenes photos and video. Alex also wrote up an article on this session which you can view over at DIY Photography